25/6
Ø
Steps to setup PyCharm:-
·
Download the PyCharm interpreter and check for
the version which supports your system.
·
I have downloaded PyCharm 2021.1.2 x 64 publisher
JetBrains s.r.o. version 211.7442.45
·
Install the PyCharm interpreter in your system.
·
Create the shortcut on desktop.
·
After installing the PyCharm open it, it will
take some time to launch.
·
In case if the interpreter is not working go to
the settings and select the desired option which is compatible with your
system.

Ø New
Project:-
·
Then after this try creating a new project.
·
For this first create a folder on desktop named
firstpy.
·
After creating a folder go to PyCharm editor
select the file menu in that select the new project option.

·
After clicking on the new project, in this
select the location and select the folder that you have created on the desktop.
Demonstrated below.

·
Then click on the create button given below.
·
It will take some time to load the libraries for
the project. Demonstrated below


·
In the above image one program is executed which
is error free.
·
And for creating a file in the same project
select the file menu and then select on new below the new project option.
·
After that it will ask for which type of file so
select the python file option and give the name to the file and enter, file
will be created.
·
Now for executing the program write the code and
then select the run menu in that select run option plain run option above debug
option.
2222/7
## # database extension - .sqlite
## # database window--> data source--> then connect to sqlite(give name to the db)
lclclick to download missing driver options
rirright click on schemas--> new--> query console-->ss
## TASK:-
- perfrom all queries on SQLlite
- enter 60 records in excel and import file into SQLlite database.
topics to cover:-
1) View
2)
steps to remember:-
right click on student--> export data to file option(csv)
right click on student--> import data to file option(csv)
### MySQL Workbench Setup:-
- STEPS:-
- Download the MySQL Workbench from the below link
https://www.mysql.com/products/workbench/
- After downloading install the MySQL Workbench in your system
- You'll have to set a password while setting up the workbench
- Remember the password as it will be used further
- It will ask for permission; when it does, click Yes. The installer will then open. Now, it will ask to choose the setup type. Here, select Custom.
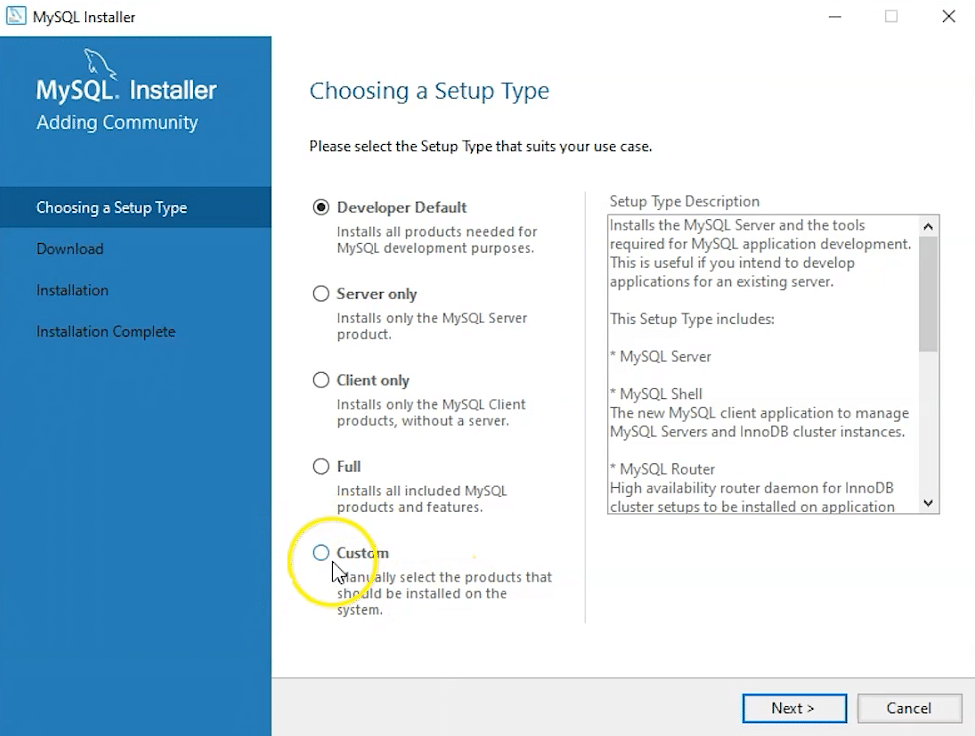
7. Click on Next. With this, you will install MySQL server, MySQL Workbench, and MySQL shell.
8. Open MySQL Servers, select the server you want to install, and move it to the Products/Features to be installed window section. Now, expand Applications, choose MySQL Workbench and MySQL shell. Move both of them to ‘Products/Features to be installed’.

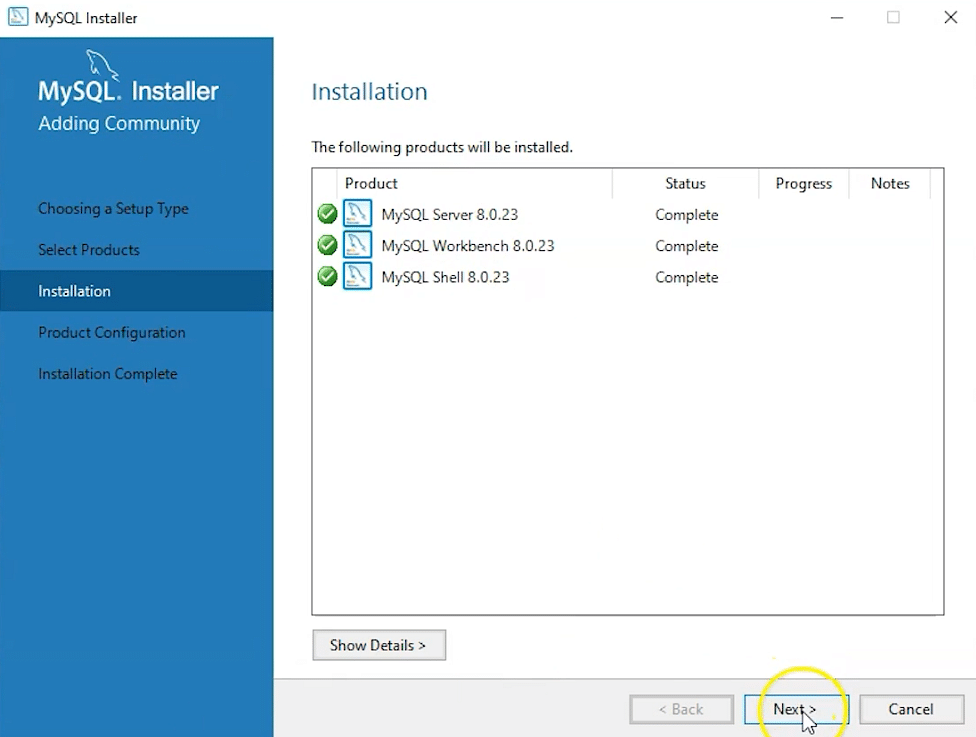
9. Click on the Next button. Now, click on the Execute button to download and install the MySQL server, MySQL Workbench, and the MySQL shell.
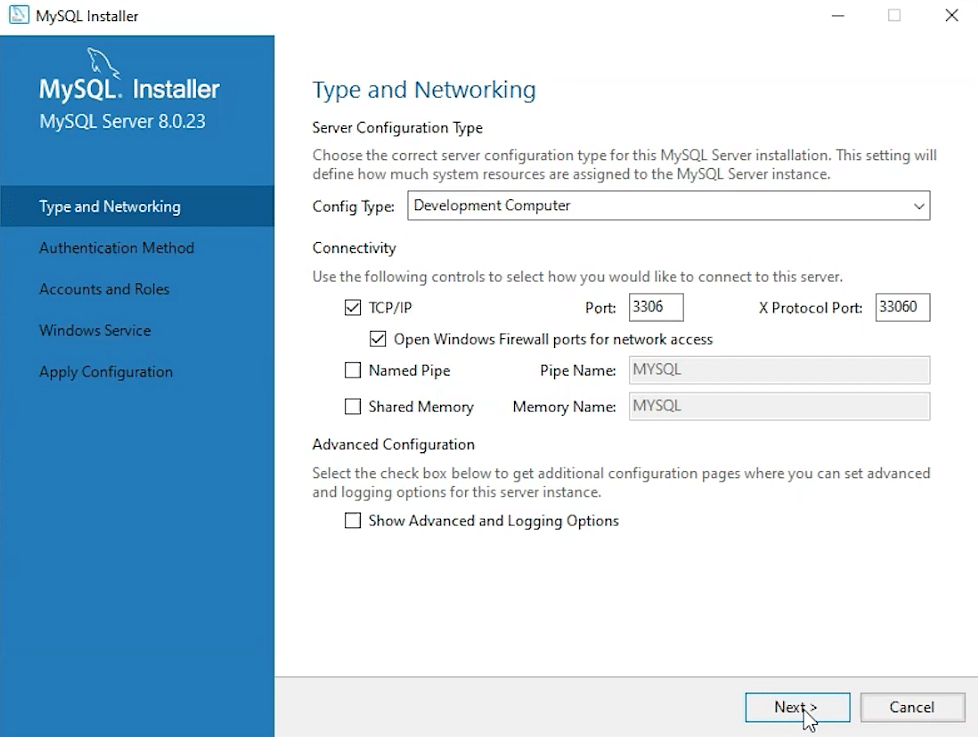
10. Once the product is ready to configure, click on Next. Under Type and Networking, go with the default settings and select Next.
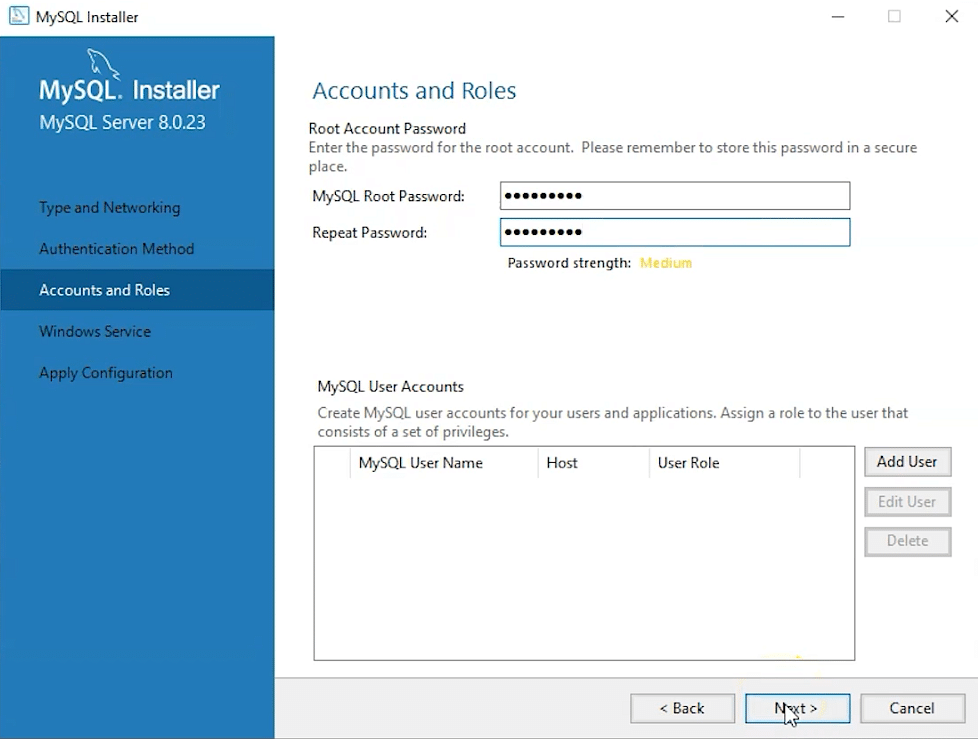
11. For authentication, use the recommended strong password encryption.
12. Set your MySQL Root password and click on next.
13. Go for the default windows service settings and under apply configuration, click on execute. Once the configuration is complete, click on finish.
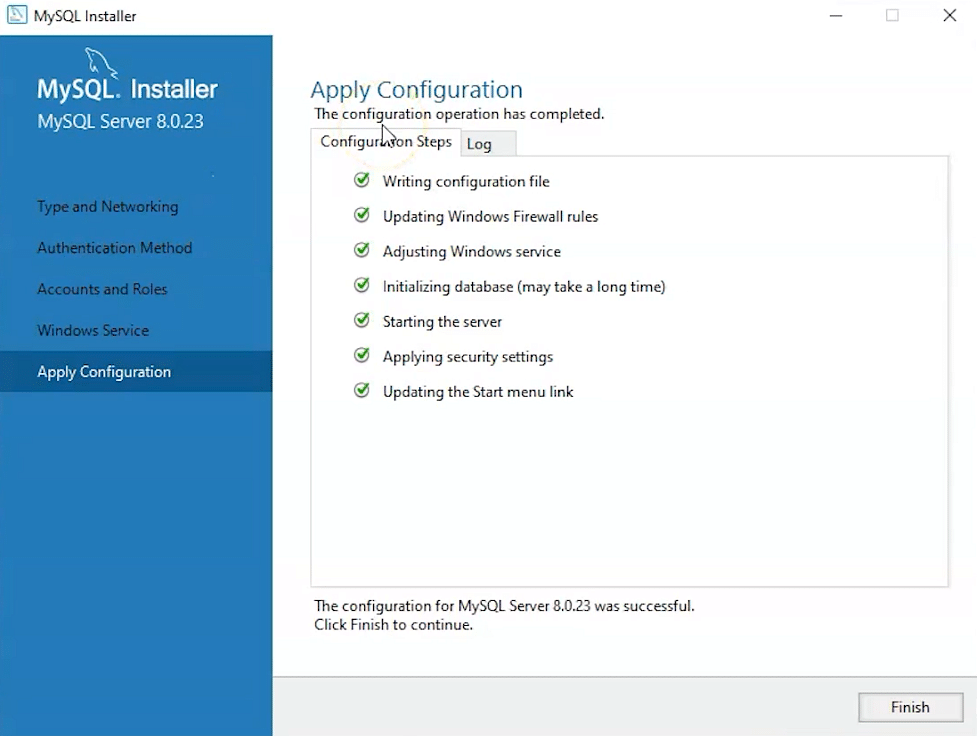
14. Complete the installation. This will now launch the MySQL Workbench and the MySQL Shell.
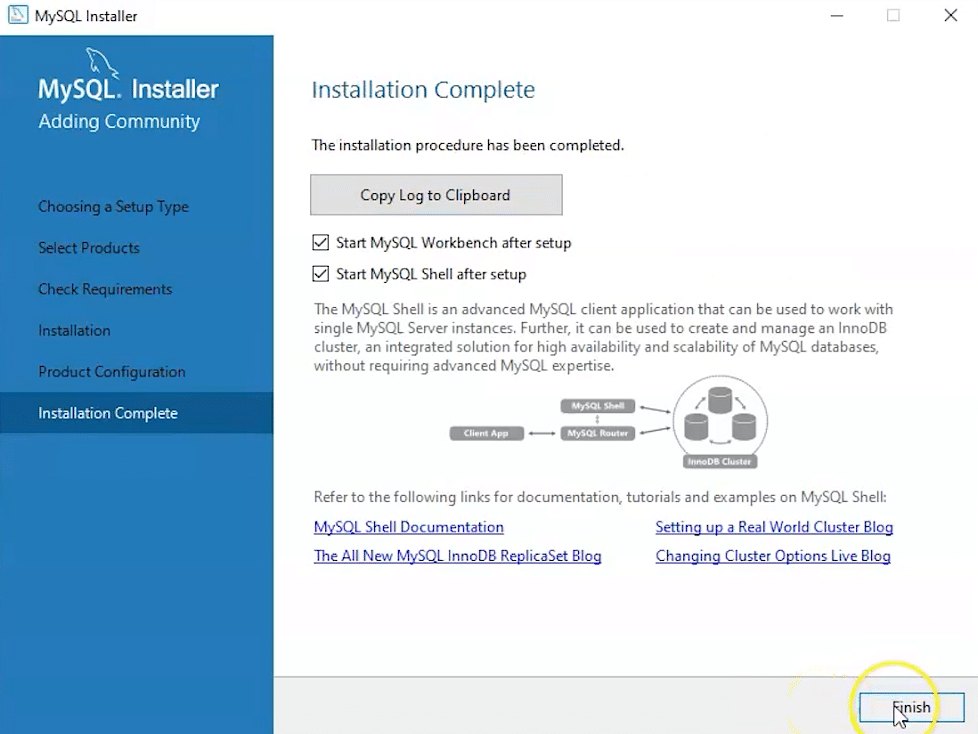
Once MySQL Workbench is installed, select the Local instance and enter the password.

Now, you can use the MySQL query tab to write your SQL queries.
- Next here click on the local instance MySQL8.0 it will establish the connection with the server and will open the workbench.
- Next click on the database icon to create the database.
- After that you can create the table inside the database that you have created by filling up the fields then click on apply it will show you the query and ask will you to apply and then click on finish.
- Your table is created.
- Now write the query on the query tab and execute.
## Steps to connect PyCharm and MySQL Workbench :-
- First connect MySQL Workbench with server then create a database. Here we will create a database for hospital as an example.


Comments
Post a Comment